Geotagging: adding a geographical position to a JIRA issue
There are several ways to geotag an issue, i.e. give it a geographical position
Create issue from map
The easiest way to geotag a JIRA issue, is to create it directly from the Mapit gadget.
Set issue position from image EXIF data
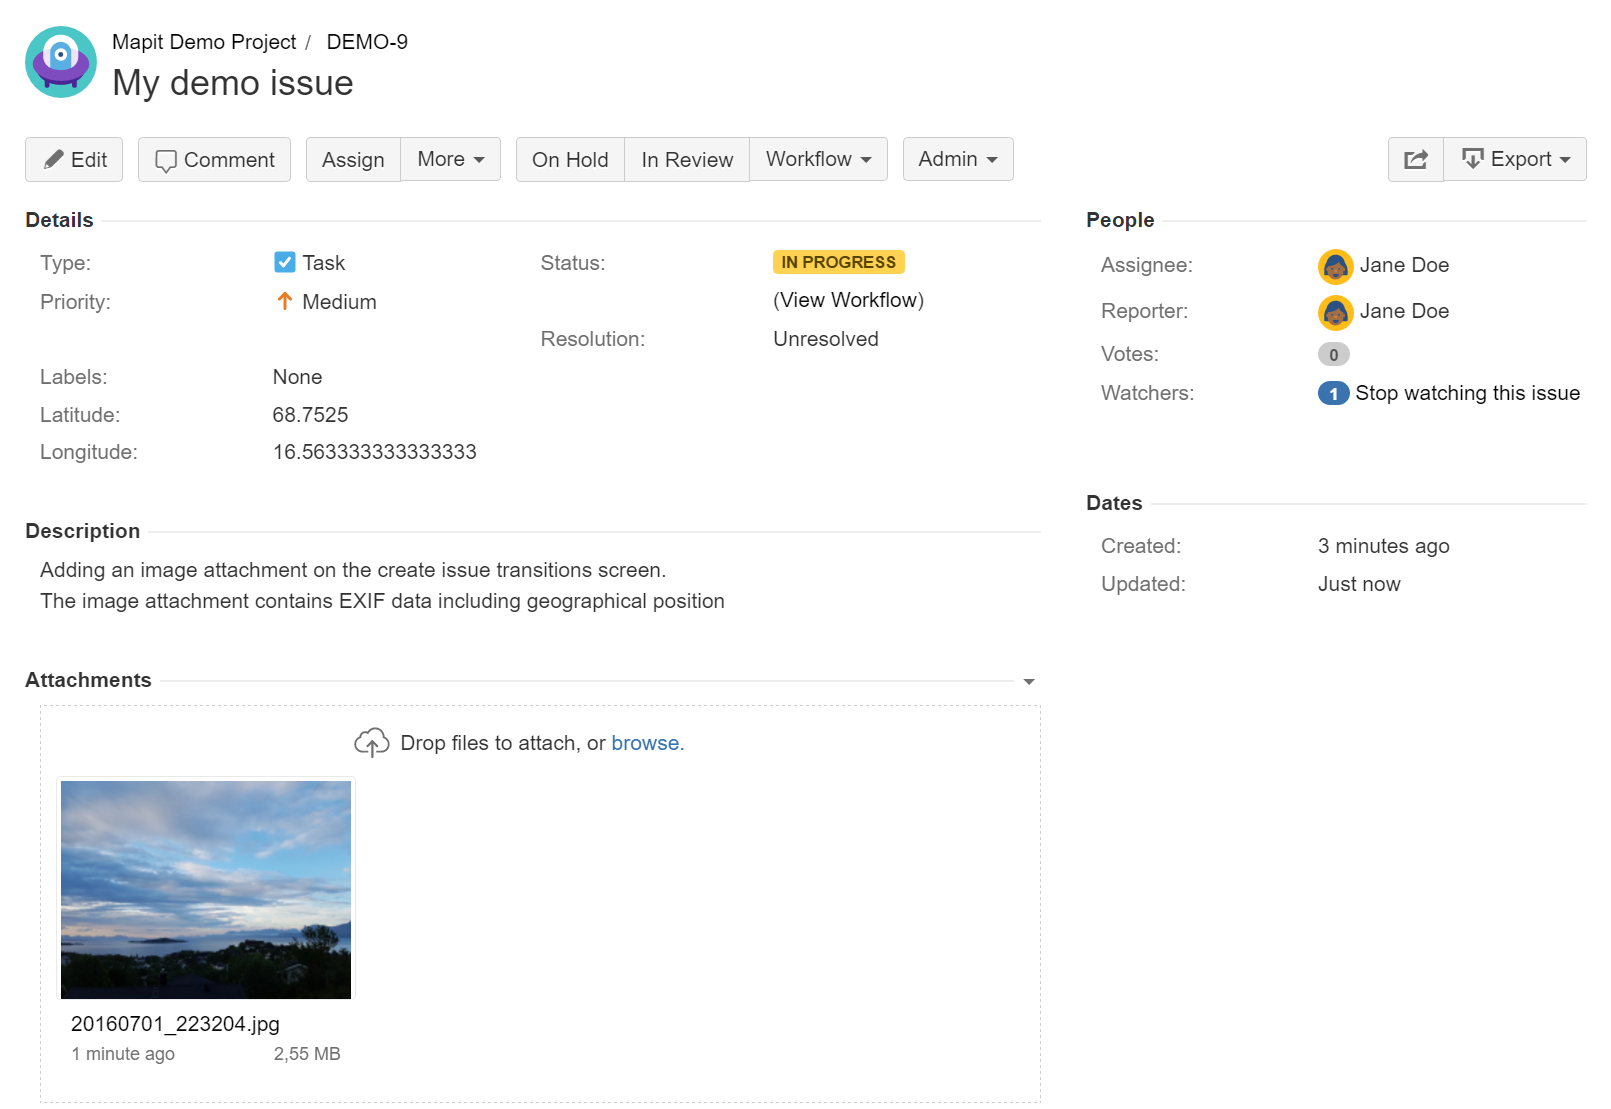
Mapit comes with a workflow post function that can automatically populate the issue position (latitude and longitude custom fields) based on an attached image's EXIF data. This can either be images that are already attached to the issue, or images added during the create issue transition. For this option to be available, your JIRA administrator must add it to the desired workflow(s). Please talk to your JIRA administrator if you are unsure whether this option is available.
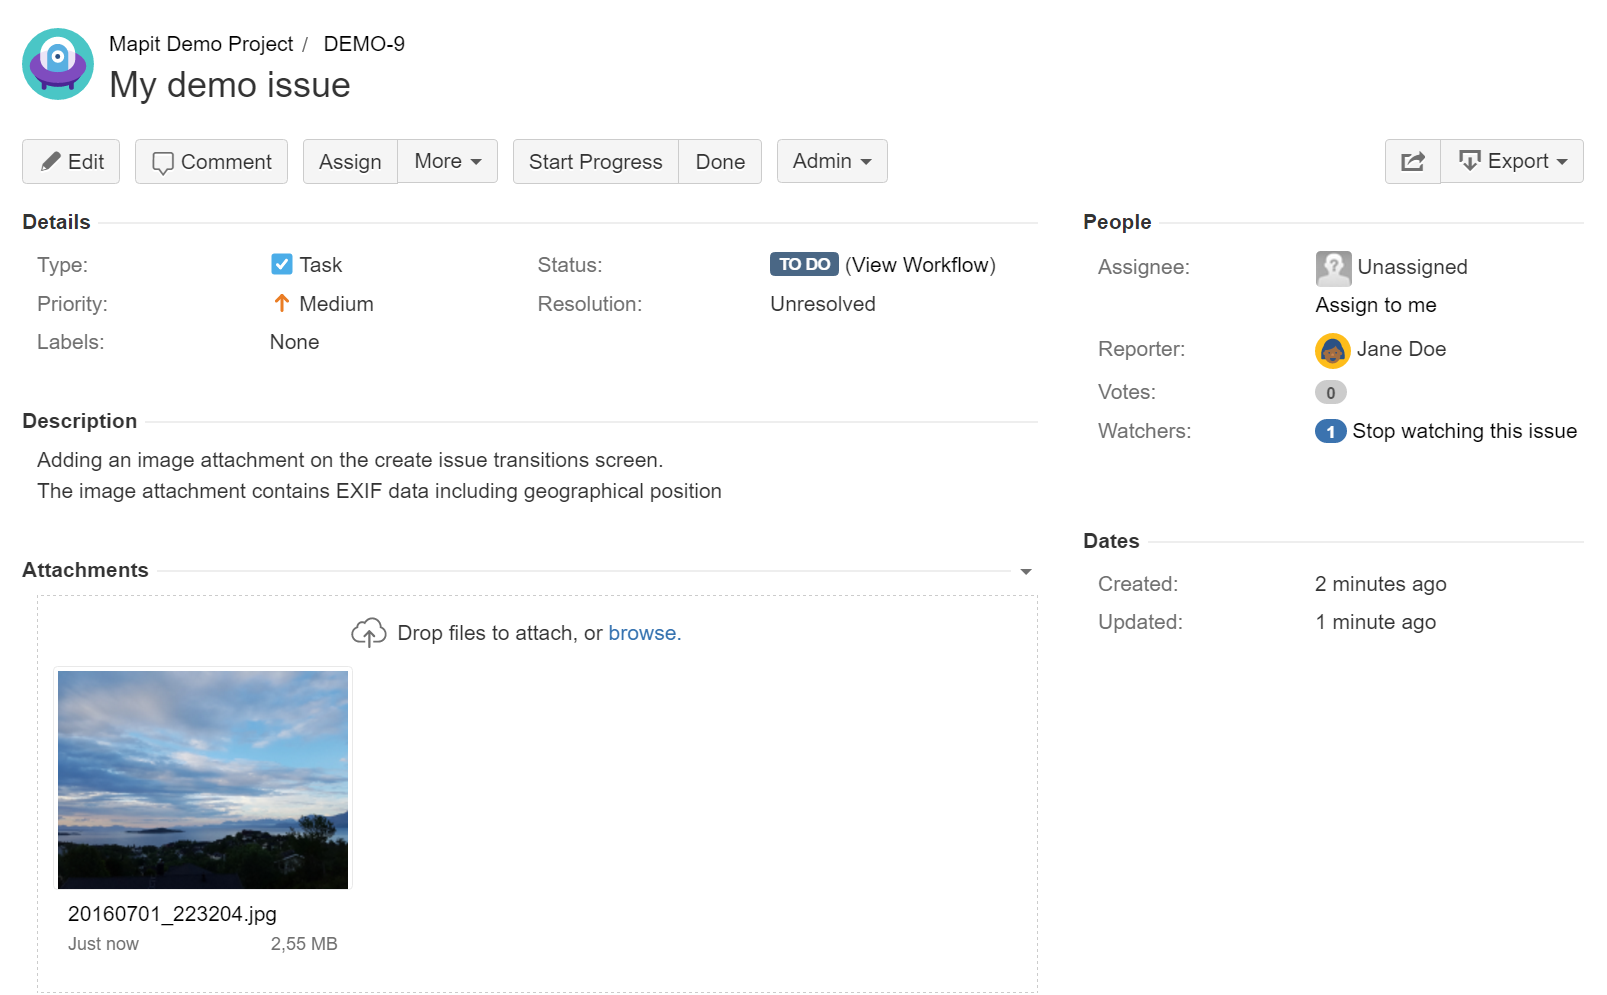
To geotag an issue using this option, make sure the issue contains an image containing a geographical position in the EXIF data.
Run the transition (in this example it's the Start Progress transition). Observe that the position has been added.
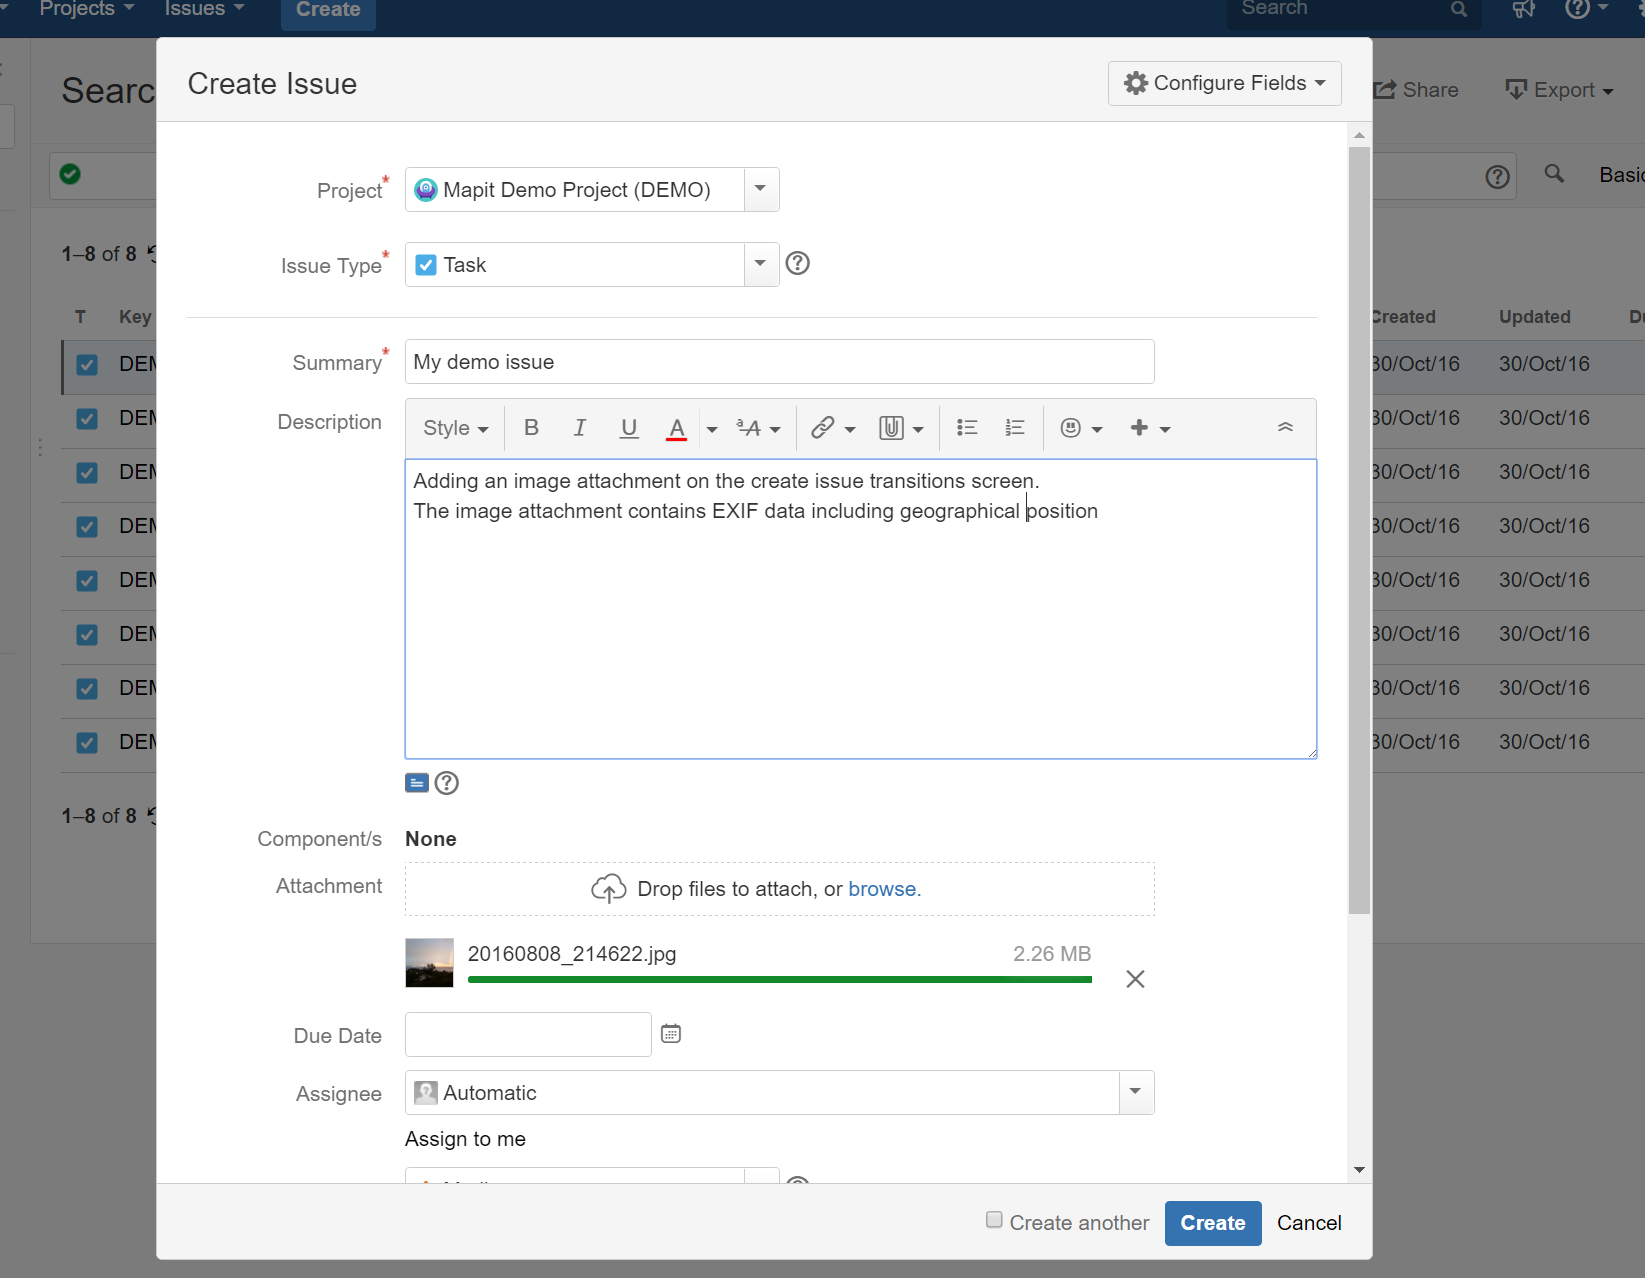
Alternatively, add an image attachment during the create issue transition (if the attachment field is available on the create screen)
If the issue is geotagged already (i.e. already contains a position), Mapit will either overwrite this position, or leave it unaltered. This is decided by your Jira administrator.
If more than one image is present, Mapit chooses the one with the latest timestamp in the EXIF data.
Manually adding position
If you want to geotag an existing issue, and the EXIF postfunction is not available or possible to use, you need to add the position manually. This is done by entering geograpic latitude and geographic longitude coordinates into the designated custom fields:
Find the position you want to add to the issue by using Mapit address search, OpenStreetMap search or other map services such as Google Maps or Bing Maps.

The format of the position (geographic latitude and longitude coordinates) must be in decimal degrees (DD), omitting the degree symbol, e.g. 68.12345 or 68,13456.
In the abovementioned map services, the latitude will be listed first, followed by the longitude.
- In a new browser tab, open the issue you want to geotag
- Click "Edit"
- Locate the issue fields for storing geographical position. The name of the fields is set by your Jira administrator, so names will vary, but the fields will most likely contain the words "latitude" and "longitude"
If you can't find these fields, please contact your Jira administrator.
- Paste the geographic latitude coordinate from step 1 into the designated latitude field
Paste the geographic longitude coordinate from step 1 into the designated longitude field
Paste the address from step 1 into the designated address field
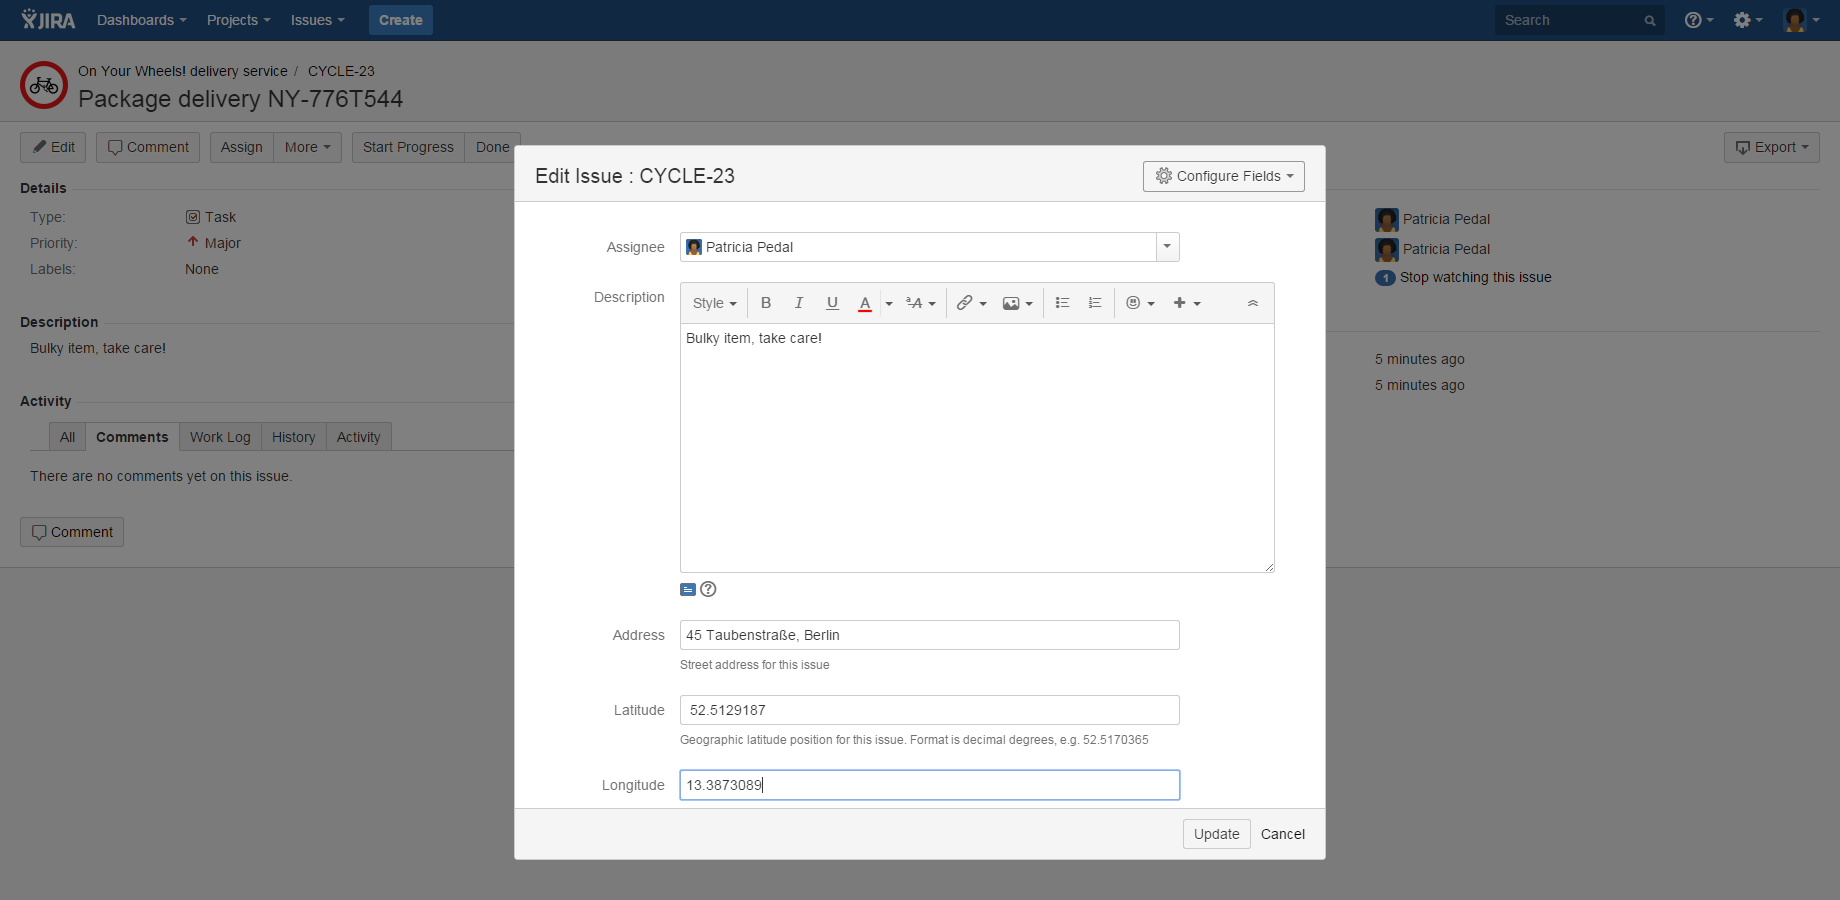
- Click "Update" to store the changes
Your issue is now geotagged! Continue to the next section to learn how to view issues in the Mapit gadget.