The easiest way to geotag a JIRA issue is to create it directly from the Mapit gadget.
Note
This function is only available if explicitly enabled by your JIRA administrator.
To create an issue from the map:
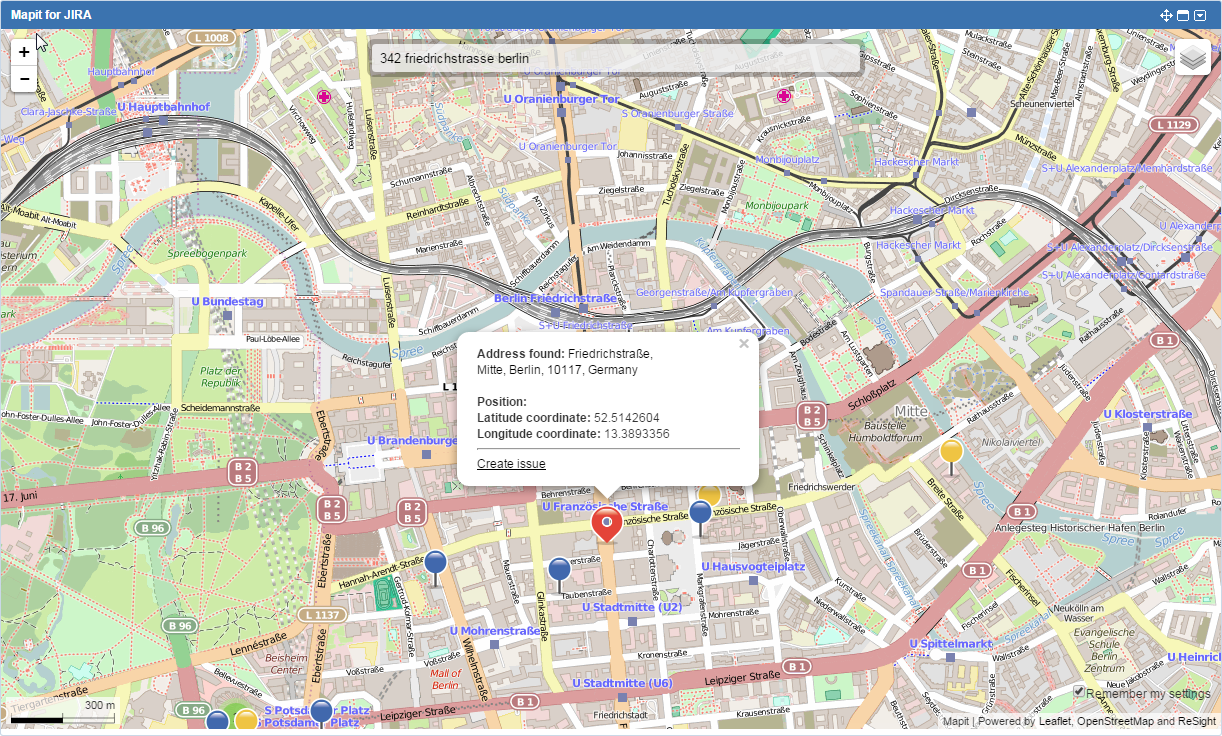
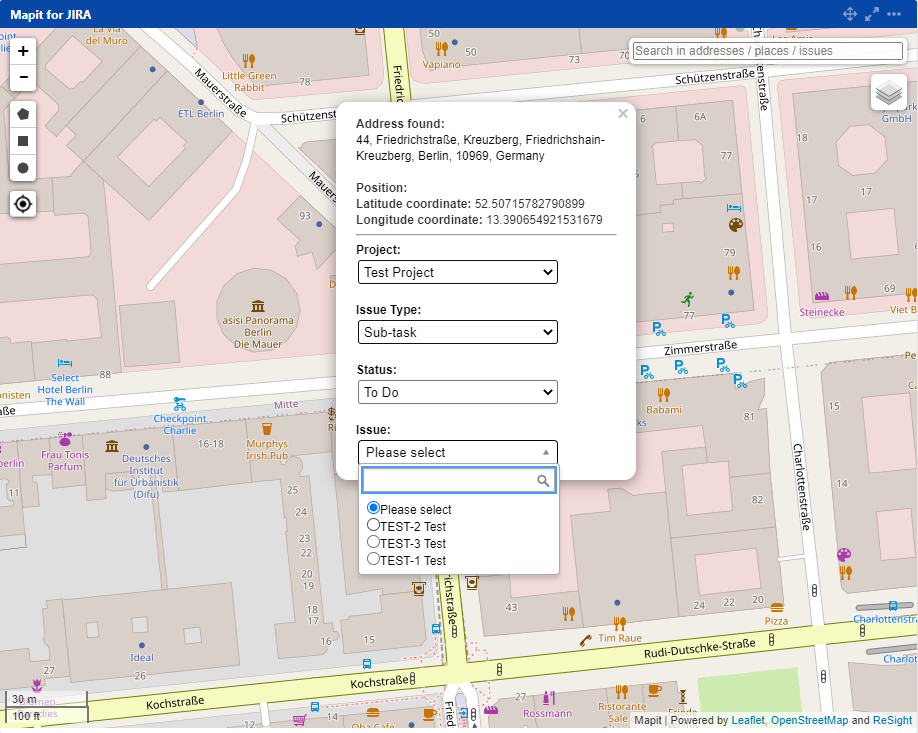
Using the address search or set pin functions, find the location where you want to create an issue (or close to where you want to create an issue). Move the pin if needed.
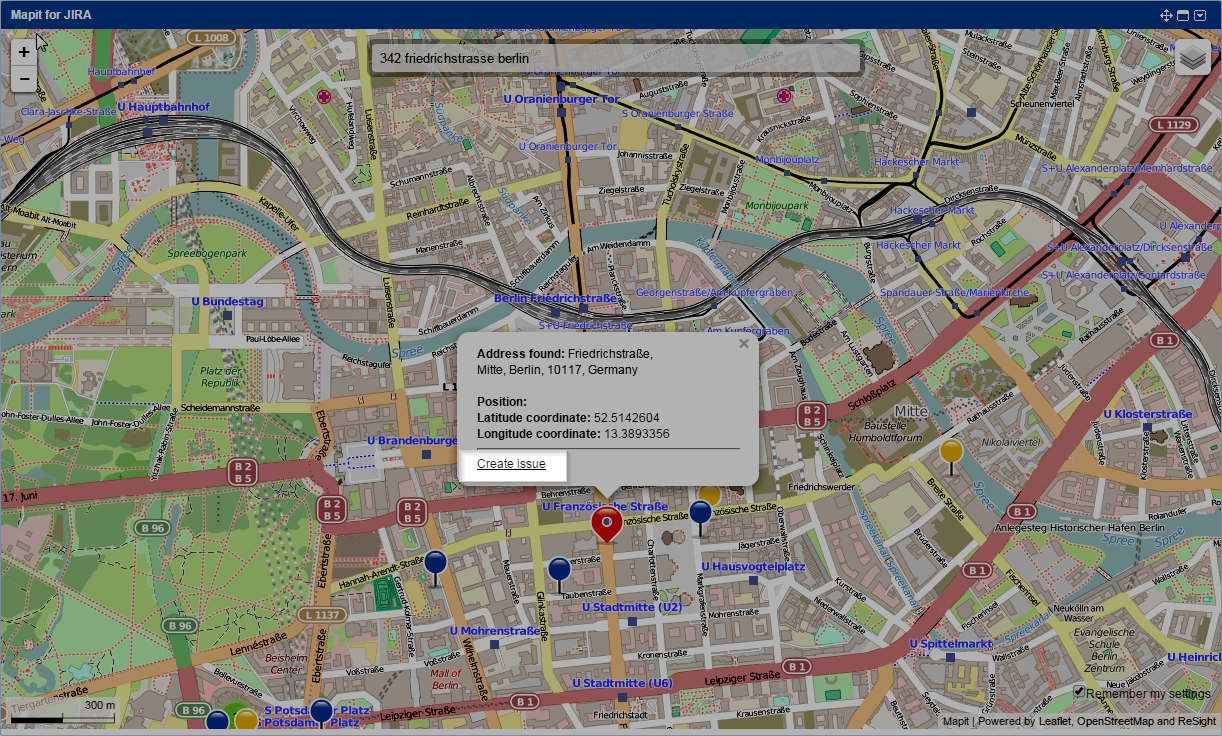
Click the "Create issue" link at the bottom of the popup box that appears above the search pin. (If the popup box has disappeared, just click the pin to bring it back.)
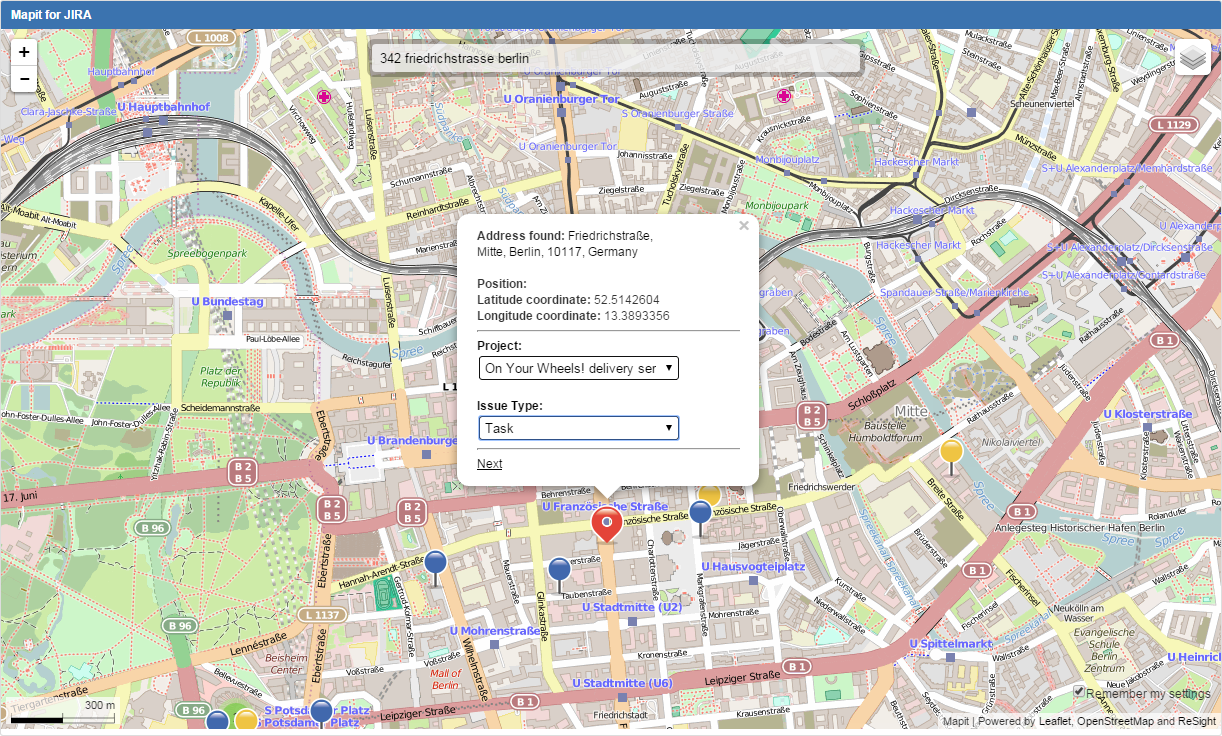
Select project and issue type from the dropdowns that appear
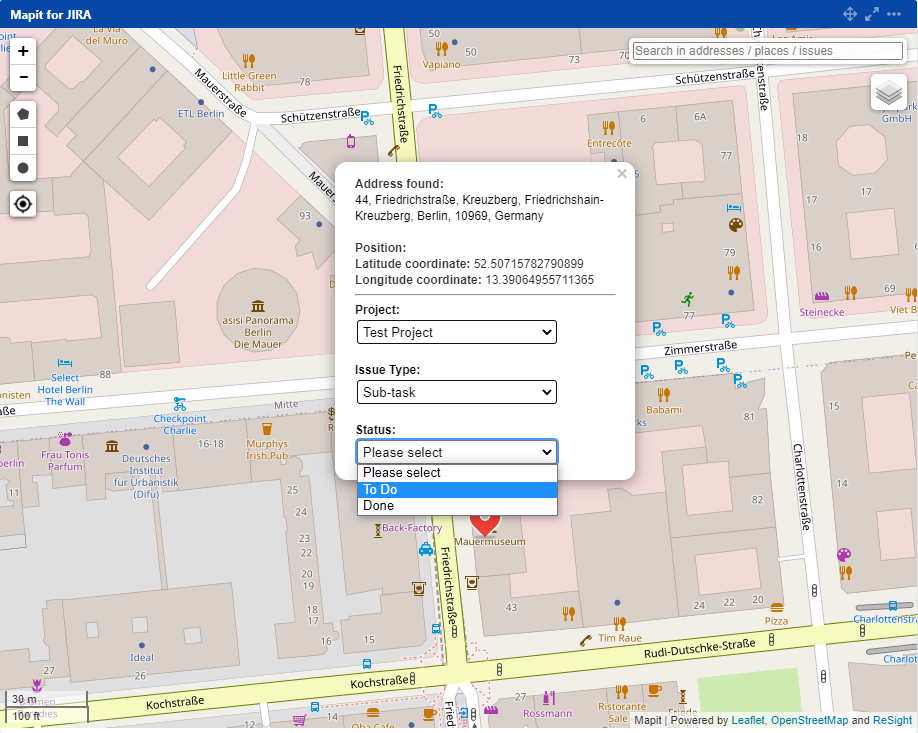
It is also possible to create subtask for the selected issue. In additional filtering, select Status
and then select the Issue that will the parent of the issue being created
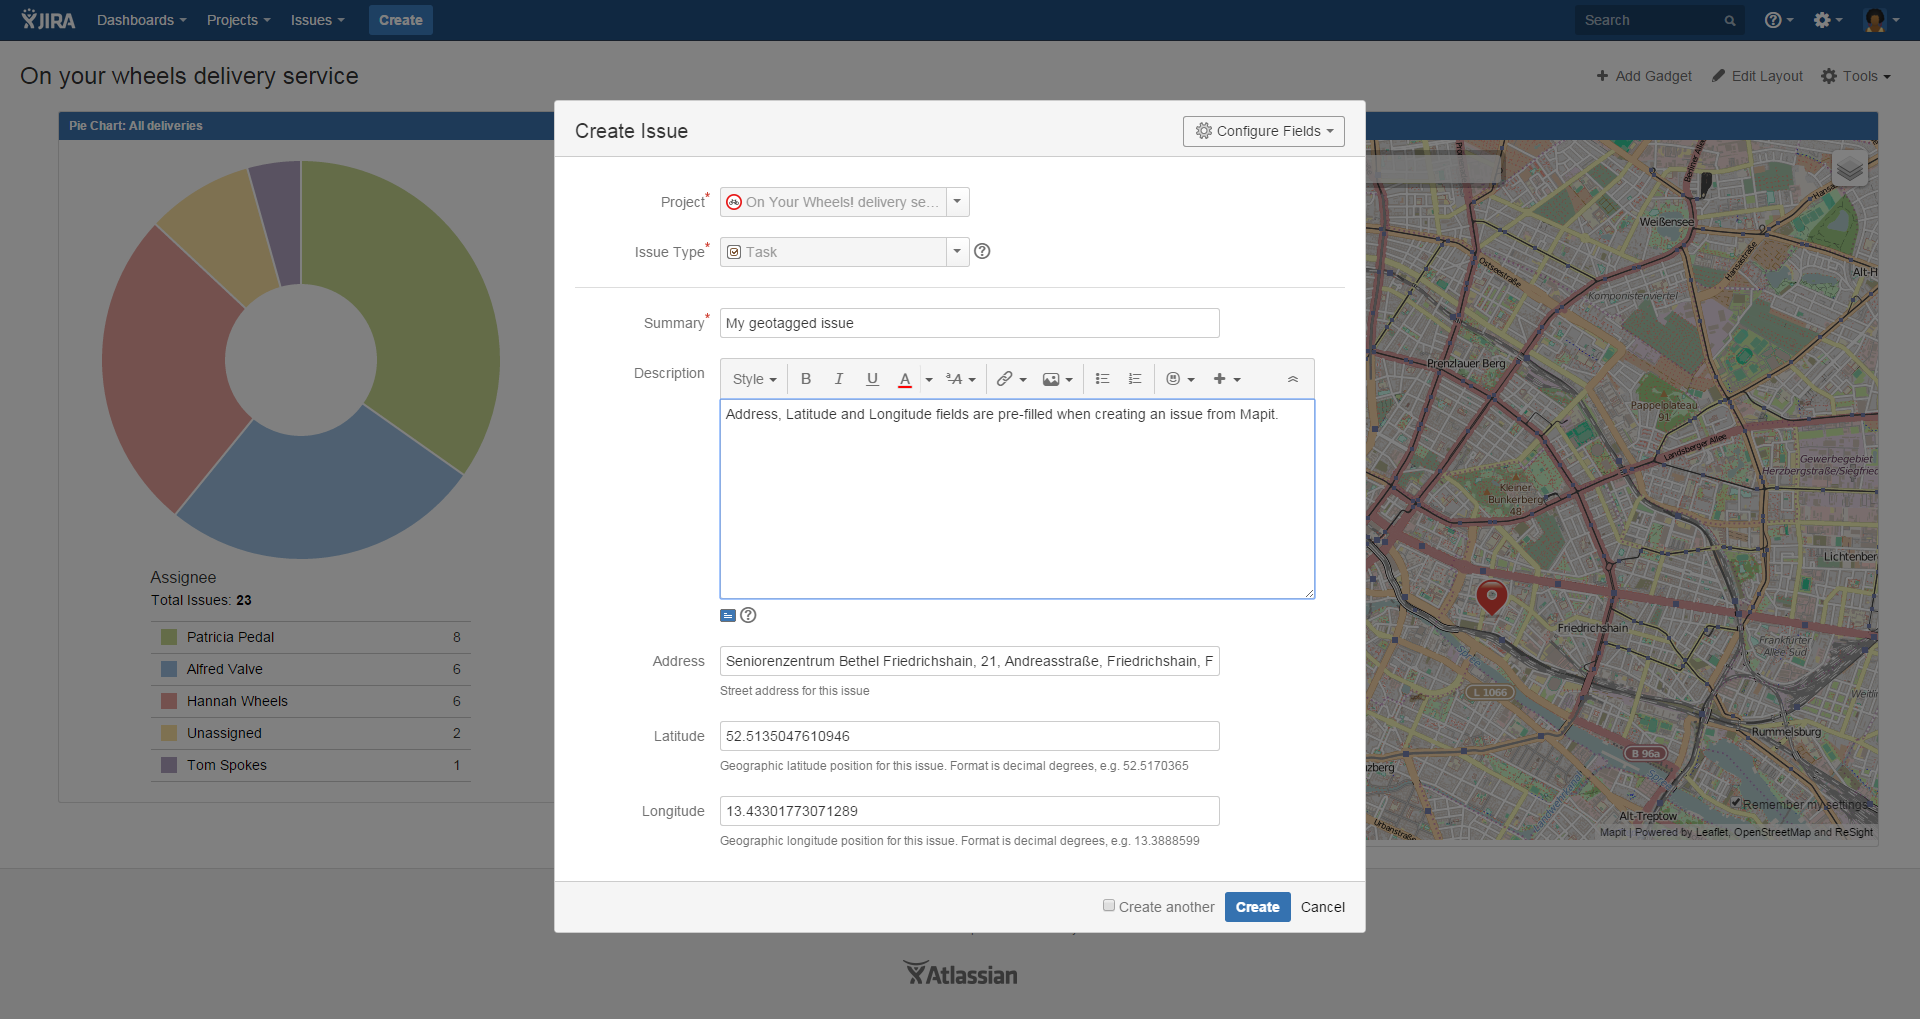
Click "Next". This brings up the JIRA Create Issue screen. Project and issuetype, as well as latitude, longitude and address fields, are pre-filled:
Fill in any other necessary information, and click the Create button. Your new, geotagged issue has been created!
Note: you need to refresh the Mapit gadget if you want to see your newly created issue in the map.
JavaScript errors detected
Please note, these errors can depend on your browser setup.
If this problem persists, please contact our support.